
Making Your Videos
Load Video to Your Micro SD Card
(Video tutorial is also available on youtube)
You can download these instructions here
- 1. Edit your video to 2x speed and save as wmv file.
- 2. Download and open 4D System’s Workshop4
- 3. Open Graphics Composer.
- 4. Add video to Graphics Composer and click a few settings.
- 5. Build output to micro sd card.
Step by Step:
1. Edit your video to 2x speed and save as wmv file (2.5 x speed for TSPP).
- When your video plays at regular speed on your computer, it will play at half speed on the MDM. You can fix this by editing your video file to 2x speed (2.5x for TSPP). You can use any video editing software, but I use Windows Live Movie Maker (WLMM).
- When you’re happy with how your video is edited, save as a wmv file. In WLMM, use the Windows Phone (small) default setting. This setting is as follows:
Display size: 320x240 pixels
Aspect ratio: Standard
Bit rate: 1.60 Mbps
When editing your video, keep in mind these tips:
- Keep your 2x video under 30 minutes. The device only supports up to 2gb micro sd cards. This is generally only enough room for about 60 minutes real time.
- Sound is not needed. You might save file space by muting or turning off sound on each clip.
- If your original file has black bars at the top and bottom, they will show up on the MDM. Try to use video that fills the screen. Whether your original file is standard or widescreen, choose standard when editing.
- Long scenes of characters talking can get boring fast.
- Use fade transitions to move through unrelated scenes.
2. Download and open 4D System’s Workshop4.
You can use the link on my website, or type in the following url:
https://4dsystems.com.au/workshop4
Depending on your computer set up, you may need to install as administrator.
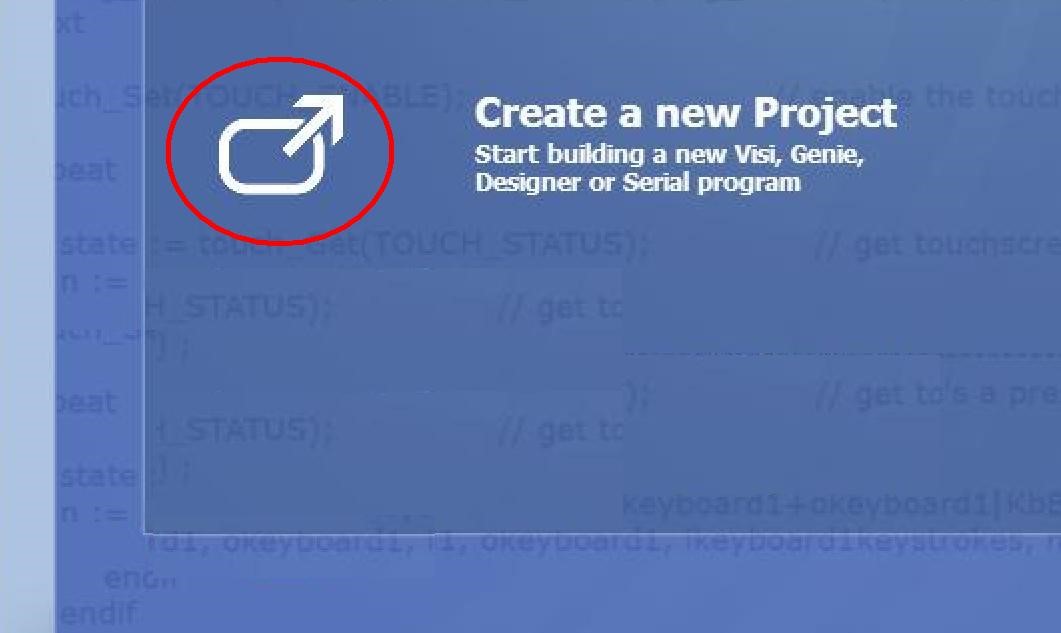
Once you open the program, from the menu screen, click the green “D” in the lower left corner titled “Create a new Project.”
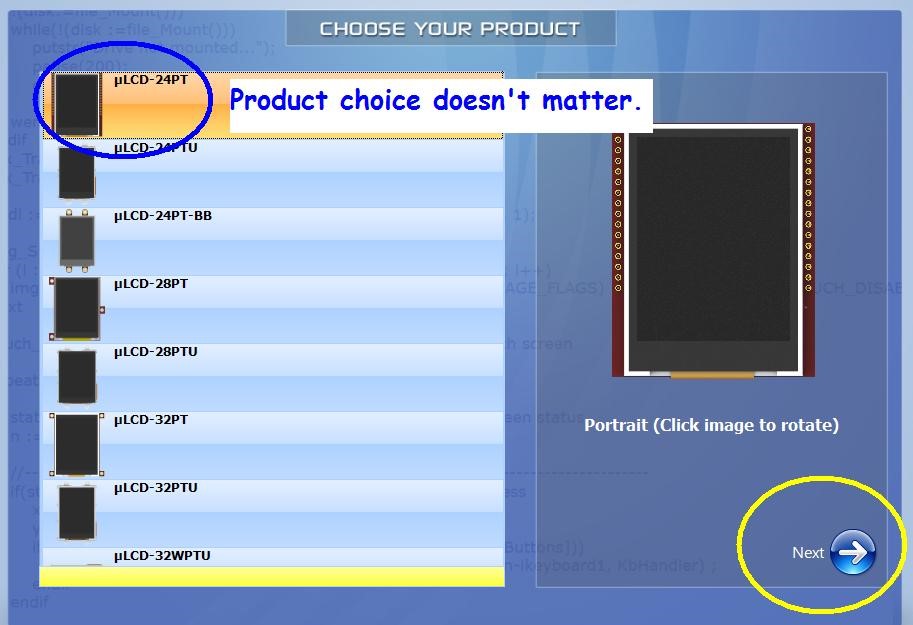
The program will ask you to choose a product. It doesn't matter what you choose. Pick any product and click next.
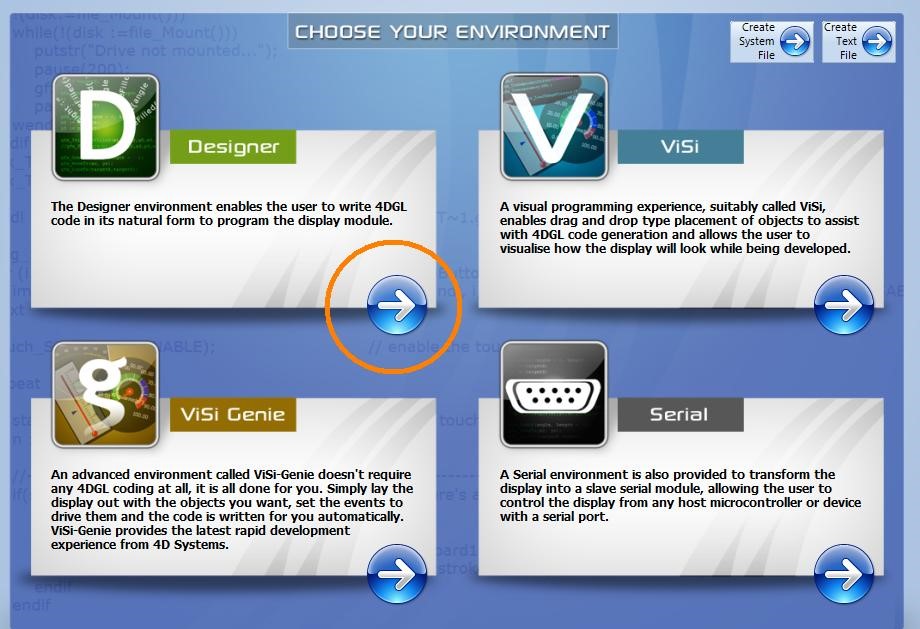
Choose "Designer"
3. Open the Graphics Composer
From the “Tools” tab, click “Graphics Composer” in the upper left corner.

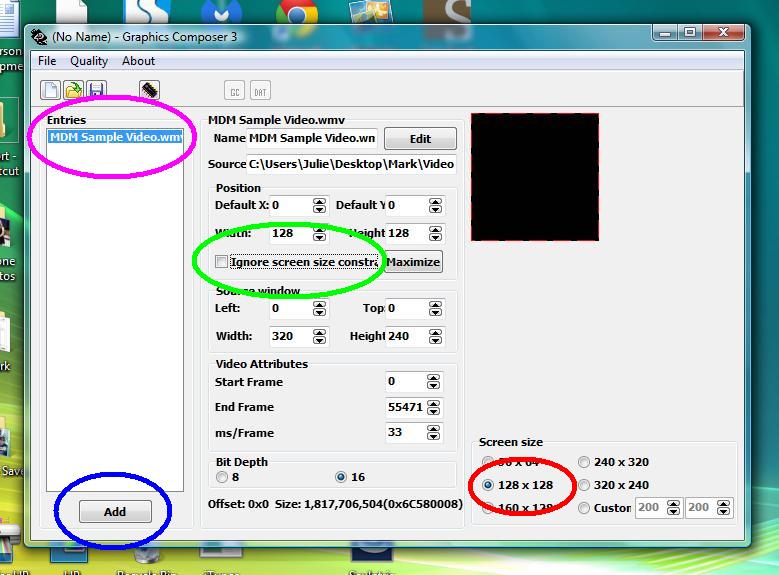
4. Add Video to Graphics Composer and Click a few Settings
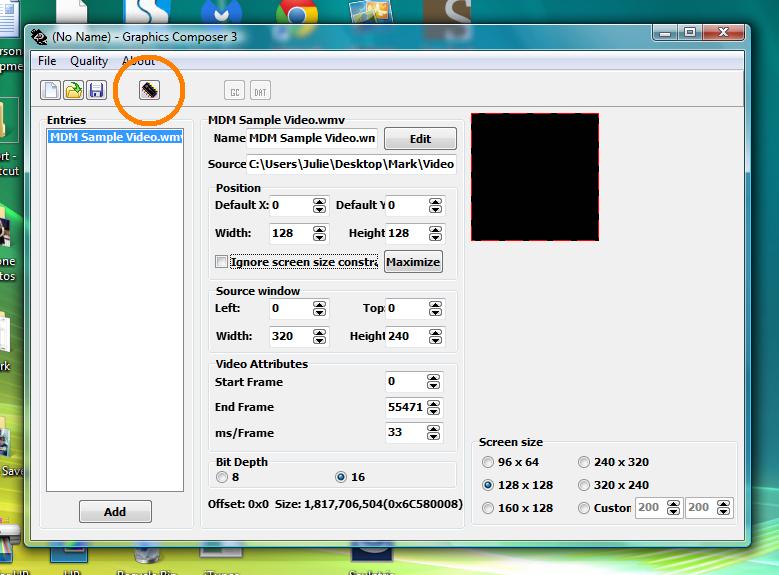
The Graphics Composer will open in a new window (see pic below).
1. Click the Display Size 128 x 128 (160 x 128 for TSPP).
2. Click the Add button to browse for your video file.
3. Your video file will appear in the white window.
4. Uncheck the box that reads “Ignore screen size restraints.”
5. Build output to micro sd card
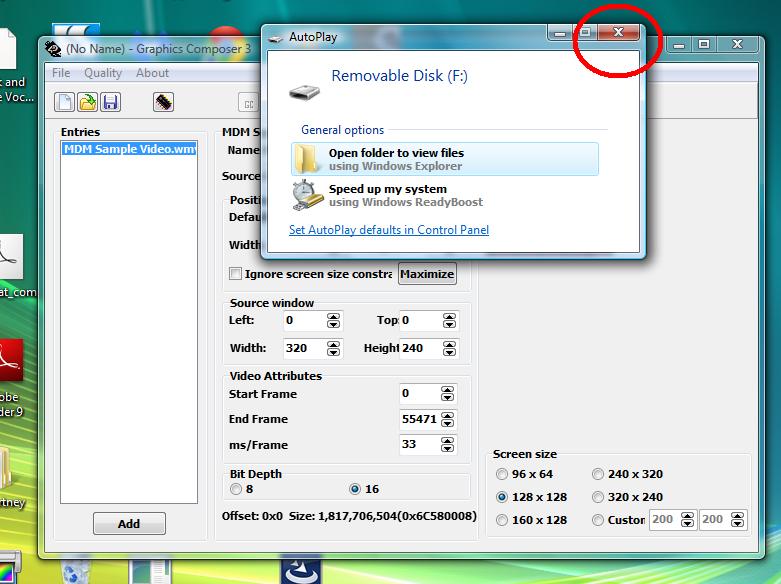
Insert the card reader and micro sd card into the computer. If you have “Autoplay,” you can close the drive when it opens.
Click the “Build Output” icon in the upper left corner (looks like a microchip).
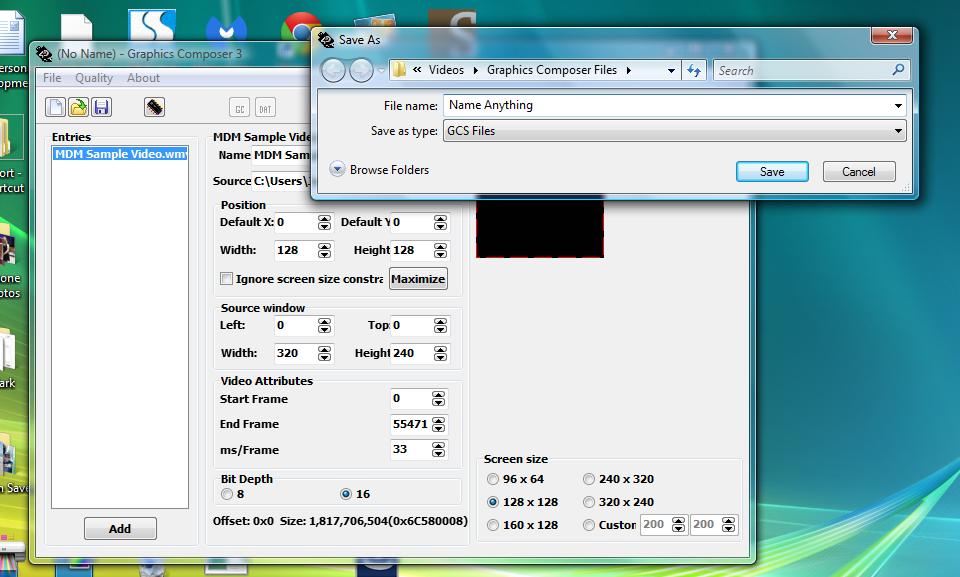
A “Save As” window will pop up. You can name this file anything. You won’t need to refer to this file again.
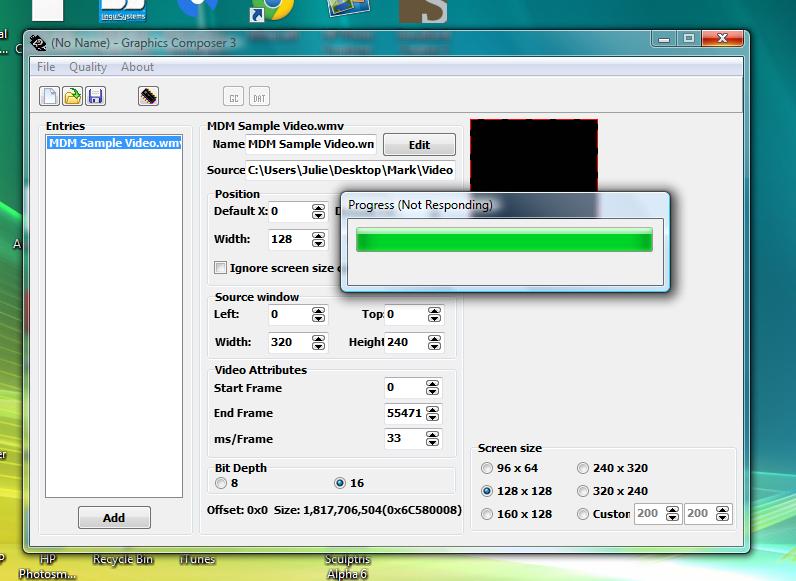
After you click “Save,” you will see a brief Progress bar. This progress bar might also indicate “(Not Responding).” This should only show briefly. The Build output window should pop up despite this.

If your drive letter is not present in the Drive field, use the drop down menu to choose it.
Although your card shows 1.84Gb, the approximate space required should be under 1.7 Gb.
Press Ok. Confirm that you want to override by clicking “Yes.”
Progress will go very slowly. The progress bar might only move in increments, so you might not see any activity for several minutes. Be patient. A video file that is 40 to 60 minutes real time, might take up to 45 minutes to complete. This would be faster if you’re using a 3.0 USB and card reader. When the progress bar disappears, safely remove the micro sd card. You are now ready to insert the card into the MDM. Wording on the card should be facing out. The gold tabs go into the slot first. Press down to spring lock the card in place.
Follow the installation instructions that came with your order.
If you have any questions, please email me at sparkypinball@yahoo.com